Is the small curved hose at the bottom of your Shark Rotator torn? Don't buy a new nozzle. Learn how to replace just the lower hose for a fraction of the cost.
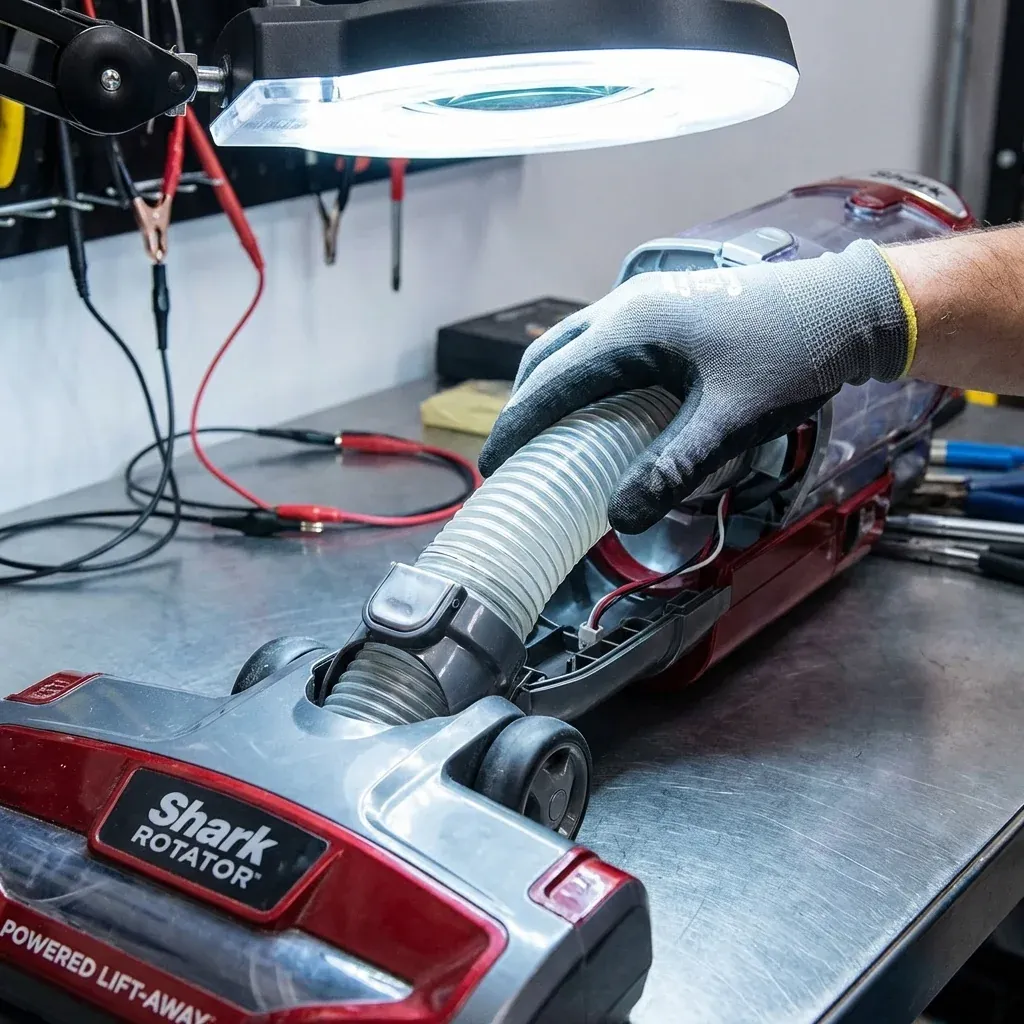
The Lower Nozzle Hose (also called the lower duct) is the small, clear, accordion-style hose that connects your floor nozzle to the main wand. Because this hose bends every time you tilt the vacuum back, it eventually develops small cracks or a total “split” after 3-4 years of use.
Is the small curved hose at the bottom of your Shark Rotator torn? Don’t buy a new nozzle. Learn how to replace just the lower hose for a fraction of the cost.
- Symptoms: Whistling noise near the floor, Visible tear in the small clear hose behind the brush roll, Total suction loss when the vacuum is reclined
- Tools: Phillips Head Screwdriver, Needle-nose Pliers, Flathead Screwdriver, Replacement Lower Duct Hose
- Difficulty: Hard
When this hose tears, the vacuum pulls air from the room instead of the floor, causing a massive loss of suction. While Shark often tells you to “replace the whole nozzle ($70+),” you can actually replace just the hose for about $15.
1. Ordering the Right Part
Not all Rotators use the same lower hose.
- NV500 Series: Requires a shorter, wider hose.
- NV750 Series (Powered Lift-Away): Uses a slightly longer hose with different locking tabs.
- Search Tip: Search for “Shark [Your Model Number] Lower Duct Hose” on Amazon or eBay to ensure the plastic clips match.
2. Removing the Broken Hose
- Safety First: Unplug the vacuum.
- Remove the Pod: Press the Lift-Away button and set the motor unit aside.
- The Pivot Screws: On most models, you must remove two Phillips head screws found at the very base of the “neck” where it pivots.
- Pop the Tabs: Use a flathead screwdriver to gently pry the plastic clips that hold the old hose into the nozzle.
- Pull Out: The hose is usually held by a “friction fit.” Twist and pull until the old, torn hose comes free.
3. Installing the New Hose
- Check the Gasket: Ensure the rubber seal inside the new hose is seated correctly.
- Slide and Click: Push the new hose into the nozzle end first. You should hear a soft “click” or feel it seat firmly.
- Connect the Neck: Slide the other end of the hose onto the neck of the vacuum.
- Secure the Screws: Re-install the two pivot screws you removed in step 2.
4. Testing the Repair
- Plug the vacuum in and turn it to “Position I” (Hard Floor mode).
- Place your hand over the end of the hose while the vacuum is reclined.
- Listen for any whistling. If it whistles, the hose is not seated perfectly in the clips.
Difficulty Breakdown
| Task Step | Difficulty | Risk Factor |
|---|---|---|
| Removing Screws | Easy | Losing a screw |
| Prying Plastic Tabs | Medium | Snapping the plastic clip |
| Seating the Hose | Hard | Improper seal leading to leaks |
| Reassembly | Medium | Misaligned pivot neck |
CAUTION: This repair requires some force to pop the plastic tabs. If the plastic feels very brittle, try warming it slightly with a hairdryer (on low heat) for 30 seconds to make the tabs more flexible and less likely to snap.